Have you ever wondered how to make beef jerky at home without all the added preservatives? You’re in the right place if you love snacking on this savoury treat but want a healthier, more affordable option. Making beef jerky at home isn’t just doable; it’s surprisingly simple and rewarding.
Store-bought beef jerky often has hidden sugars, artificial flavours, and a hefty price tag. Making it yourself allows you to control the ingredients, tailor the flavours to your taste, and save money. Plus, the process itself is a fun culinary adventure that even beginners can master.
In this guide, we’ll walk you through everything you need to know to make the perfect beef jerky at home. From choosing the best cuts of beef to mastering the marinating process and drying techniques, you’ll be equipped with all the tips and tricks to create a batch your family and friends will love. Ready to get started?
What is Beef Jerky?
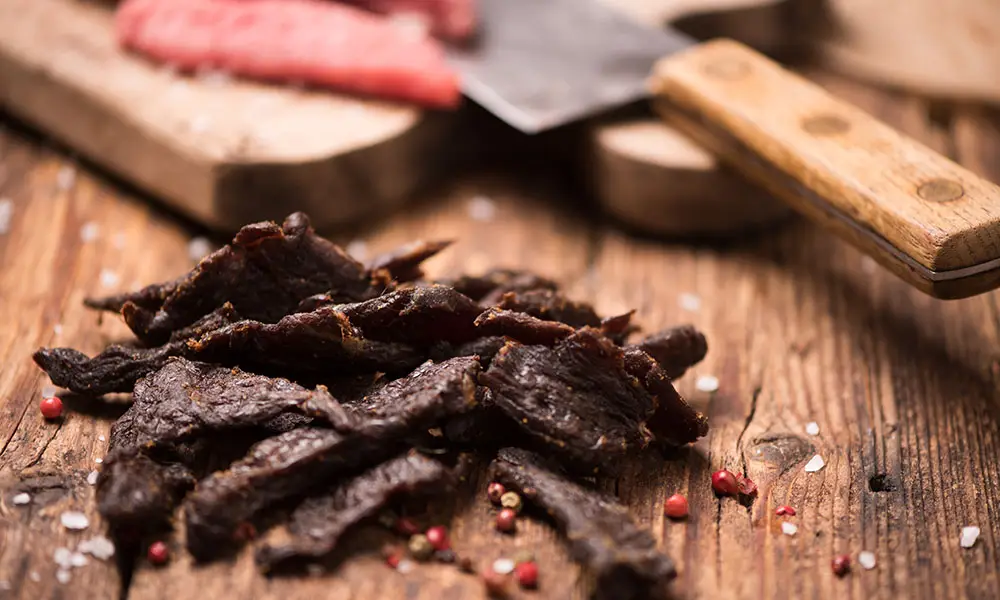
Beef jerky is a classic snack made by drying and curing thin slices of beef. This process preserves the meat and concentrates its rich, savoury flavours.
Traditionally, beef jerky was a practical way to store meat for long periods without refrigeration. Today, it’s a go-to high-protein snack for people on the move, from hikers to office workers.
Why Make It at Home When You Can Buy It from the Store?
Let’s face it: store-bought beef jerky can be convenient, but it’s not always the best choice. Here’s why making it at home is worth the effort:
- Customisable Flavours: Want spicy, sweet, or smoky? At home, you can experiment with marinades to suit your taste.
- Healthier Ingredients: Ditch the added sugars, artificial preservatives, and excessive sodium found in many commercial brands.
- Cost-Effective: A homemade batch costs a fraction of the price of pre-packaged jerky.
- Satisfying Experience: There’s something deeply satisfying about creating your snacks from scratch.
A Step-by-Step Guide to Making Beef Jerky at Home
Here’s how to make beef jerky at home in a few simple steps:
1. Choosing Your Beef
The foundation of any great jerky lies in the quality of your beef. Lean cuts and grass fed beef are ideal, as they minimise fat content and reduce the risk of spoilage. Excellent choices include:
- Eye of Round: This lean cut offers a good balance of flavour and tenderness.
- Top Round: Another lean option that produces flavorful jerky.
- Sirloin: A slightly more flavorful choice, but ensure you trim away any visible fat.
2. Slicing the Beef
Consistent slicing is crucial for even drying and a pleasant eating experience.
- Slice the beef across the grain into thin, uniform strips approximately ¼ inch thick. Cutting against the grain helps to break down the muscle fibres, resulting in more tender jerky.
- For easier slicing, partially freeze the meat for 1-2 hours. This slightly firms up the meat, making it easier to slice without it shifting or tearing.
3. Preparing the Marinade
The marinade is where the magic happens! It infuses the beef with flavour and helps to tenderise it. Experiment with different combinations to find your favourite:
- Base: Start with a base of soy sauce and Worcestershire sauce.
- Spices: Add garlic powder, onion powder, black pepper, and chilli powder for a classic flavour profile.
- Sweetness: Incorporate brown sugar or honey for a touch of sweetness.
- Heat: Add red pepper flakes, cayenne pepper, or a pinch of smoked paprika for a spicy kick.
4. Marinating the Meat
Allow ample time for the flavours to penetrate the meat:
- Place the beef strips in a resealable plastic bag or a glass dish.
- Pour the marinade over the meat, ensuring each piece is thoroughly coated.
- Refrigerate for at least 6 hours, or ideally, overnight.
5. Drying the Meat
This is the crucial step that transforms marinated beef into delectable jerky.
- Oven Method:
- Preheat your oven to 70°C (160°F).
- Place the beef strips on a wire rack set over a baking sheet. This allows for better air circulation and ensures even drying.
- Prop the oven door slightly open with a wooden spoon or a folded towel to allow moisture to escape.
- Dry for 4-6 hours, flipping the strips halfway through to ensure even drying.
- Dehydrator Method:
- Arrange the beef strips in a single layer on the dehydrator trays.
- Set the dehydrator to 70°C (160°F).
- Dry for 4-6 hours or until the jerky is firm but still slightly pliable.
- Monitoring:
- Regularly check the jerky during the drying process.
- Over-drying will result in brittle, hard jerky.
- Under-drying can lead to spoilage.
6. Storing and Enjoying
Proper storage is essential to maintain your homemade jerky’s quality and shelf life.
- Cool Down: Allow the jerky to cool completely before storing.
- Airtight Containers: Store the jerky in airtight containers, such as glass jars or resealable bags.
- Refrigeration: For extended storage, refrigerate the jerky. This can significantly increase its shelf life.
- Room Temperature: At room temperature, jerky can typically be stored for up to two weeks.
Now you’re ready to enjoy the fruits of your labour! Savour the flavour of your homemade beef jerky, whether it’s on its own as a snack or incorporated into your favourite recipes.
We offer premium quality beef jerky that is healthy and makes for a great snack.
What Cuts of Beef Work the Best for Beef Jerky?
Not all beef is created equal when it comes to jerky. Here are some top choices:
- Eye of Round: Affordable and lean, making it a popular option.
- Top Round: Similar to eye of round but slightly more tender.
- Sirloin Tip: A bit pricier but offers excellent flavour.
Avoid cuts with a lot of marbling, as the fat can spoil quickly during storage.
How Much Beef Should I Buy for the Recipe?
As a rule of thumb, you’ll need about 1.5 kg (3 lbs) of raw beef to produce 500 g (1 lb) of finished jerky. The drying process removes most of the water content, resulting in significant weight loss.
Tips to Make the Best Beef Jerky at Home
Use Fresh Meat
The quality of your beef jerky starts with the quality of your meat. Opt for the freshest cuts possible, ideally from a local butcher or a reputable source. Fresh meat boasts superior flavour and ensures a more tender and enjoyable final product. Avoid meat sitting in the display case for too long, as it may have lost some of its moisture and flavour.
Don’t Skimp on Marinating
Marinating is a crucial step in the jerky-making process. It not only infuses the meat with flavour but also helps to tenderise it. A longer marination time generally results in more robust flavours, allowing the spices and seasonings to penetrate deeper into the meat.
To find your perfect flavour combination, experiment with different marinades, such as soy sauce, Worcestershire sauce, brown sugar, garlic powder, and various spices.
Slice Against the Grain
Slicing your meat against the grain is essential for achieving tender jerky. The muscle fibres in meat run in a particular direction, and cutting against them breaks them down, resulting in a more tender and easier-to-chew final product.
Use a sharp knife to ensure clean, even slices. If you’re having trouble visualising the grain, slightly freeze the meat before slicing, as this can help you identify the direction of the fibres.
Monitor Drying Time
Whether you are using an oven or making beef jerky in a dehydrator, proper drying time is critical for achieving your jerky’s ideal texture and shelf life. Over-drying can lead to brittle, hard jerky that is unpleasant to eat. On the other hand, under-drying can leave the jerky too moist, potentially leading to spoilage.
Monitor the drying process closely, checking the jerky periodically to ensure it reaches the desired level of dryness. The specific drying time will vary depending on the thickness of the slices, the type of dehydrator or oven used, and the desired level of dryness.
Experiment with Flavors
Don’t be afraid to get creative with your flavours! While classic beef jerky often features simple seasonings like salt and pepper, there are endless possibilities for customisation. Experiment with different spices, herbs, and flavourings to create unique and delicious jerky.
Consider adding a dash of liquid smoke for a smoky flavour, a sprinkle of chilli flakes for some heat, or a touch of honey for a hint of sweetness. The possibilities are limited only by your imagination.
To Wrap Up
Making beef jerky at home is fun and a healthier and more affordable alternative to store-bought options. With the right ingredients, tools, and techniques, you can whip up a batch that’s bursting with flavour and perfectly tailored to your taste.
Which flavour combination will you try first? Give it a go and savour the satisfaction of homemade snacks.
Looking for high-quality, grass-fed beef? Gingin Grass Fed offers premium cuts perfect for your jerky-making adventure.
FAQs
1. Can I use other meats for jerky?
Yes, turkey, chicken, and even venison can be used, but the process may vary slightly.
2. How do I know when the jerky is done?
The jerky should be firm and slightly pliable, not brittle or moist.
3. Can I store jerky without refrigeration?
Yes, but it’s best to consume it within two weeks or refrigerate it for longer shelf life.
4. Do I need special equipment?
A dehydrator is ideal but not essential. An oven works just fine.
5. Is homemade jerky cost-effective?
Absolutely! While there’s an upfront cost for beef and ingredients, it’s much cheaper in the long run.