
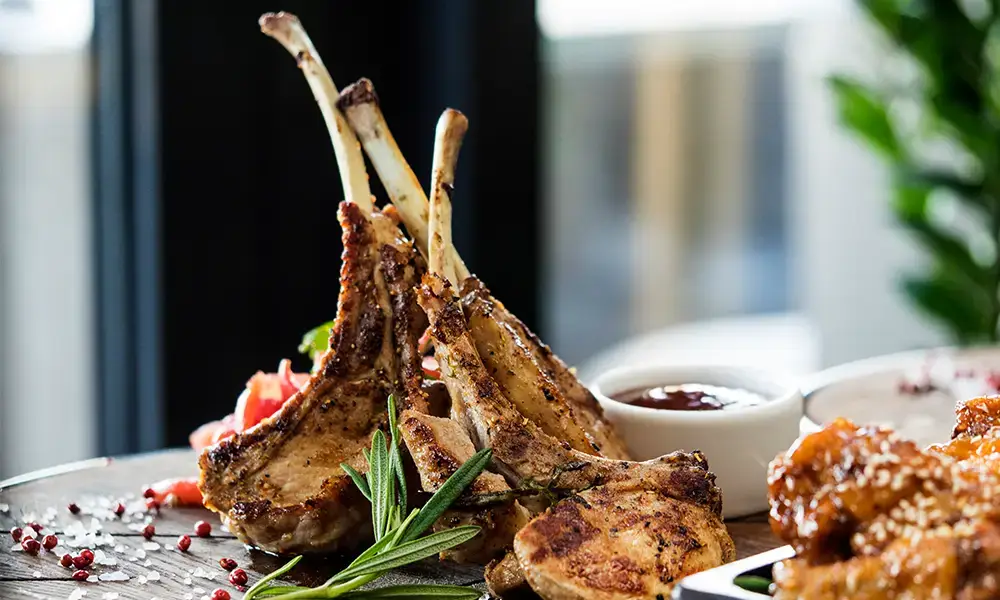
A Frenched lamb rack is one of the most elegant cuts you can serve at home, with its clean bones and neatly trimmed presentation making it look far more complicated to cook than it actually is. With the right technique, you can achieve tender, juicy, restaurant-style results without any special training.
This guide walks through everything you need, using our Frenched Lamb Rack as your starting point.
What Does “Frenched” Actually Mean?
Frenched refers to the technique of trimming excess fat and meat from the bones of a rack, leaving them clean and exposed. This is purely a presentation style, it doesn’t change the flavour, but it does make for a much more impressive plate and easier carving between the ribs.
Preparing Your Lamb Rack Before Cooking
- Remove from the fridge 20–30 minutes before cooking to take the chill off, helping it cook more evenly.
- Pat the surface dry with paper towel to help achieve a good sear.
- Season generously with salt, pepper, and herbs like rosemary or thyme, which pair particularly well with lamb.
- Cover the exposed bones with foil if roasting, to prevent them from charring or burning.
Step-by-Step: How to Cook Frenched Lamb Rack
Step 1: Sear First for a Golden Crust
Heat a heavy pan with a little oil until very hot, then sear the rack fat-side down first for 2–3 minutes, followed by the remaining sides, to build a deep, golden crust.
Step 2: Finish in the Oven
Transfer the seared rack to an oven preheated to around 180–200°C. Because lamb rack is a relatively thin, tender cut, it cooks quickly, so close attention is important from this point.
Step 3: Monitor Internal Temperature Closely
Use a meat thermometer inserted into the thickest part of the rack, avoiding the bone. General targets are:
- Rare: 50–52°C
- Medium-rare: 54–57°C
- Medium: 60–63°C
Lamb rack is generally best served medium-rare to medium, since overcooking can quickly dry out this leaner, delicate cut.
Step 4: Rest Before Carving
Rest for 8–10 minutes under loose foil before slicing between the bones. This short resting period allows juices to redistribute, keeping each cutlet tender and moist.
How to Carve a Lamb Rack
- Identify the bones as your natural carving guide.
- Slice cleanly between each bone, producing individual cutlets.
- Serve immediately while still warm, arranging cutlets slightly overlapping for presentation.
Common Mistakes to Avoid
- Overcooking, since lamb rack is lean and dries out quickly past medium.
- Skipping the rest period, resulting in juices lost onto the board rather than staying in the meat.
- Cooking straight from the fridge, leading to uneven results between the outside and centre.
- Not searing before roasting, missing out on the flavour built through caramelisation.
What to Serve with Frenched Lamb Rack
- A herb and garlic crust, made from breadcrumbs, rosemary, and garlic, pressed onto the rack before its final roast.
- Roasted root vegetables, like carrots and parsnips, which pair naturally with lamb’s richness.
- A simple mint or red wine jus, balancing the dish with acidity.
- Creamy mashed potato, for a classic, comforting side.
Why Grass-Fed Lamb Makes a Difference
Grass-fed lamb tends to carry a cleaner, more distinct flavour compared to grain-finished alternatives, particularly noticeable in a delicate cut like rack where there’s nowhere for poor quality to hide. Our lamb comes from Western Australian farms committed to pasture-raised, ethical farming practices.
For more premium cuts, it’s worth browsing our full Lamb range.
Final Thoughts
Frenched lamb rack looks impressive, but it’s genuinely simple to cook well once you understand the sear-then-roast method and pay close attention to internal temperature. With a short rest before carving, you’ll get tender, juicy results every time.
Order the Frenched Lamb Rack today and bring a restaurant-quality centrepiece to your next dinner.